How to Wear a Hair Fork (Part 1)
June 11, 2014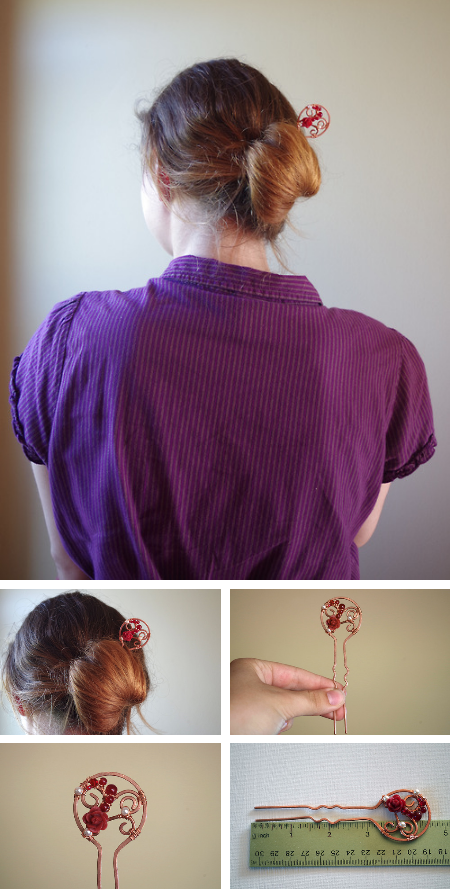
Last week, a friend of mine came over after work to go hiking at our house. Before we changed into workout clothes, I insisted she come into my studio and model for me "real quick."
I had just made a hair fork-- a decorative two-prong hair stick made out of copper-- and snagged a couple of pictures before we headed out. The next day, I shared the pictures on Tumblr and Facebook and uploaded it to my Etsy shoppe, and was greatly surprised by the response!
Over the past week I've made several more hair forks, all of which can be seen on my Etsy shop, or (if they sell), in my gallery of old items on Facebook.
Over the past week I've made several more hair forks, all of which can be seen on my Etsy shop, or (if they sell), in my gallery of old items on Facebook.
I've come up with seven different hair styles using my hair forks! Below are five of them, along with video and picture tutorials. Tomorrow I'll post the final two!
When using a hair fork, remember that you weave them into your hair the same way that you weave in a hair stick or a hair fork: push backwards on the bun, switch to font, and then wiggle it up to the middle of the bun then switch to wiggle it down by your scalp. (If that made no sense, watch the first video!).
If you use a hair fork (whether mine or one you already have) and do these hairstyles or come up with another, feel free to share pictures in the comments or by emailing me! I might do a little gallery of the pictures! :)
(P.S. Scroll to the bottom for free shipping on any hair forks through 6.20.14!)

Click "READ MORE" to see 5 ways to wear a hair fork!
(Hair forks pictured above: Woodland Green Hair Fork Set and Purple and Gold Twilight Hair Fork. Hair fork used in the video: Purple and Gold Twilight Hair Fork).
The Twist Bun is the easiest hairstyle to do!
I started with an accent braid on the side, but you can do the bun without any braids at all, of course!
 1. Hold your hair as if you were going to make a ponytail.
 2. Twist your hair tightly.
 3. Coil your hair around and tuck the ends under.
 4. Push in the hair fork. Insert in the bun and push it out.
 5. Weave the hair fork the other way and push it through the bun.
 6. Ta-da! A finished twist braid! It will stay in all day!
________________________________
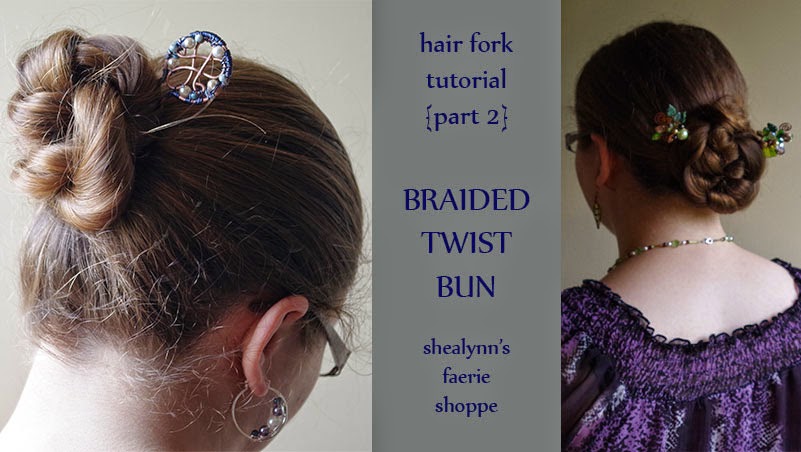
(Hair forks pictured above: Midnight Blue Celtic Knot Hair Fork and Woodland Green Hair Fork Set . Used in video: Woodland Green Hair Fork Set . Used in video on the variation hairstyle: Copper Celtic Knot Hair Fork.).
Braided Twist Bun
 1. Make a low braid at the nape of your neck.
 2. Coil like a twist bun and insert your hair fork.
3. Enjoy your deceptively fancy-looking bun!
________________________________
Braided Twist Bun Variation: Side Braid

1. (Optional). Part your hair on the side. Starting at the part, twist your hair up in sections. The twist should wrap around the back of your head.

2. Make a side braid. In this case, I did a rope braid.

3. Coil the braid into a twist bun right by your ear.

4. Insert the hair stick! :)
________________________________

(Pictured above and used in video: Blue Spiral Hair Fork. Used in variation: Woodland Green Hair Fork Set.)
Half-up Hairstyle


Honestly this one doesn't need much of a tutorial. Just separate the top half of your hair and make a basic twist bun!
________________________________
Half-up Hairstyle Variation

1. This was made up on the spot, so it's a bit different. Start with a half-up twist bun. Braid the bottom part of your hair, at the nape of your neck OR at the side of the nape of your neck like I did.

2. Wrap the braid around the original bun.

3. Insert another hair fork, or secure the braid with a bobby pin.
(For those who are interested, you can get free shipping on your entire order from my etsy Shoppe if you include a hair fork in your order! Use this coupon code at checkout: HAIRFORKSHIPPING2014 It is good until June 20th, 2014).


4 comments